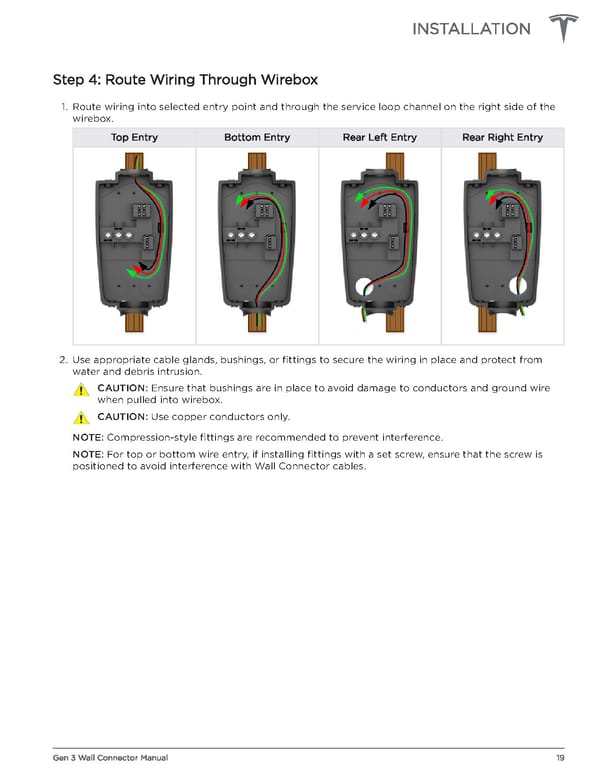
INSTALLATION Step 4: Route Wiring Through Wirebox 1. Route wiring into selected entry point and through the service loop channel on the right side of the wirebox. Top Entry Bottom Entry Rear Left Entry Rear Right Entry 2. Use appropriate cable glands, bushings, or fittings to secure the wiring in place and protect from water and debris intrusion. CAUTION: Ensure that bushings are in place to avoid damage to conductors and ground wire when pulled into wirebox. CAUTION: Use copper conductors only. NOTE: Compression-style fittings are recommended to prevent interference. NOTE: For top or bottom wire entry, if installing fittings with a set screw, ensure that the screw is positioned to avoid interference with Wall Connector cables. Gen 3 Wall Connector Manual 19
 Tesla Gen 3 Wall Connector | Installation Manual Page 20 Page 22