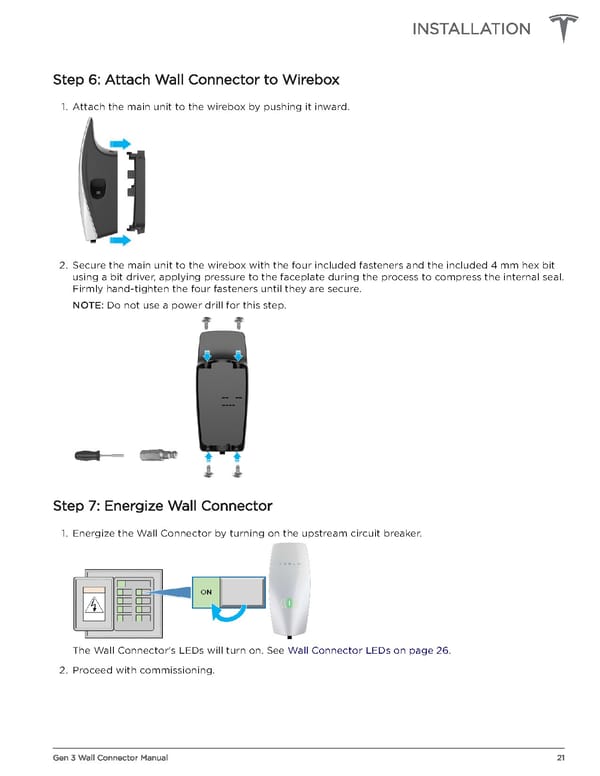
INSTALLATION Step 6: Attach Wall Connector to Wirebox 1. Attach the main unit to the wirebox by pushing it inward. 2. Secure the main unit to the wirebox with the four included fasteners and the included 4 mm hex bit using a bit driver, applying pressure to the faceplate during the process to compress the internal seal. Firmly hand-tighten the four fasteners until they are secure. NOTE: Do not use a power drill for this step. Step 7: Energize Wall Connector 1. Energize the Wall Connector by turning on the upstream circuit breaker. The Wall Connector's LEDs will turn on. See Wall Connector LEDs on page 26. 2. Proceed with commissioning. Gen 3 Wall Connector Manual 21
 Tesla Gen 3 Wall Connector | Installation Manual Page 22 Page 24