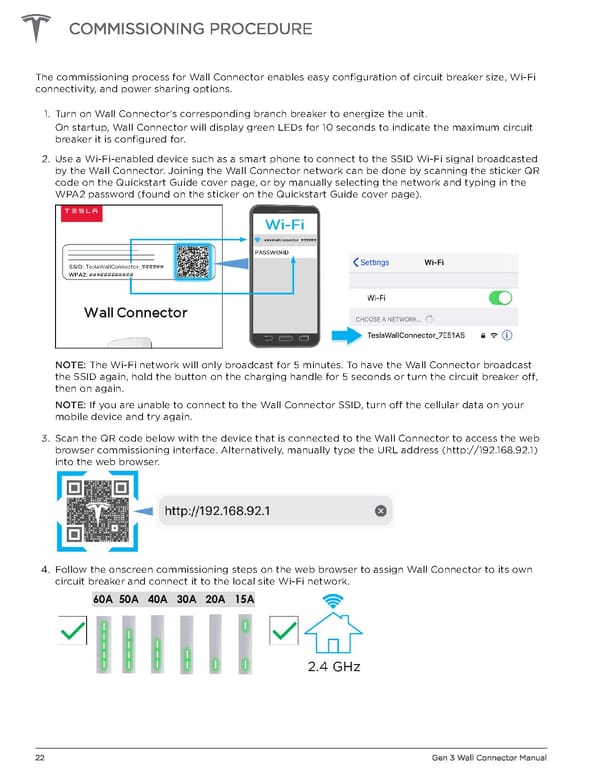
COMMISSIONING PROCEDURE The commissioning process for Wall Connector enables easy configuration of circuit breaker size, Wi-Fi connectivity, and power sharing options. 1. Turn on Wall Connector's corresponding branch breaker to energize the unit. On startup, Wall Connector will display green LEDs for 10 seconds to indicate the maximum circuit breaker it is configured for. 2. Use a Wi-Fi-enabled device such as a smart phone to connect to the SSID Wi-Fi signal broadcasted by the Wall Connector. Joining the Wall Connector network can be done by scanning the sticker QR code on the Quickstart Guide cover page, or by manually selecting the network and typing in the WPA2 password (found on the sticker on the Quickstart Guide cover page). NOTE: The Wi-Fi network will only broadcast for 5 minutes. To have the Wall Connector broadcast the SSID again, hold the button on the charging handle for 5 seconds or turn the circuit breaker off, then on again. NOTE: If you are unable to connect to the Wall Connector SSID, turn off the cellular data on your mobile device and try again. 3. Scan the QR code below with the device that is connected to the Wall Connector to access the web browser commissioning interface. Alternatively, manually type the URL address (http://192.168.92.1) into the web browser. 4. Follow the onscreen commissioning steps on the web browser to assign Wall Connector to its own circuit breaker and connect it to the local site Wi-Fi network. 22 Gen 3 Wall Connector Manual
 Tesla Gen 3 Wall Connector | Installation Manual Page 23 Page 25