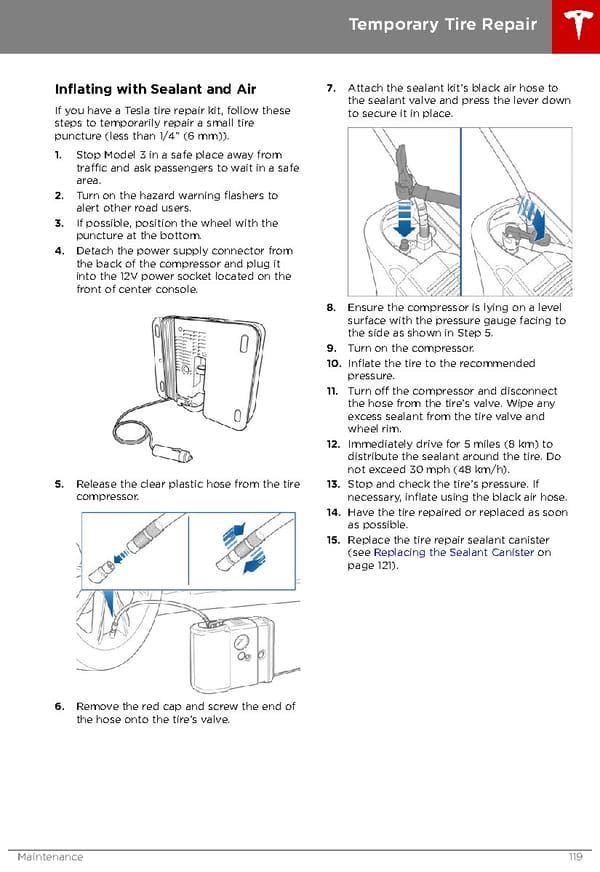
Temporary Tire Repair Inflating with Sealant and Air 7. Attach the sealant kit†s black air hose to the sealant valve and press the lever down If you have a Tesla tire repair kit, follow these to secure it in place. steps to temporarily repair a small tire puncture (less than 1/4” (6 mm)). 1. Stop Model 3 in a safe place away from traffic and ask passengers to wait in a safe area. 2. Turn on the hazard warning flashers to alert other road users. 3. If possible, position the wheel with the puncture at the bottom. 4. Detach the power supply connector from the back of the compressor and plug it into the 12V power socket located on the front of center console. 8. Ensure the compressor is lying on a level surface with the pressure gauge facing to the side as shown in Step 5. 9. Turn on the compressor. 10. Inflate the tire to the recommended pressure. 11. Turn off the compressor and disconnect the hose from the tire†s valve. Wipe any excess sealant from the tire valve and wheel rim. 12. Immediately drive for 5 miles (8 km) to distribute the sealant around the tire. Do not exceed 30 mph (48 km/h). 5. Release the clear plastic hose from the tire 13. Stop and check the tire†s pressure. If compressor. necessary, inflate using the black air hose. 14. Have the tire repaired or replaced as soon as possible. 15. Replace the tire repair sealant canister (see Replacing the Sealant Canister on page 121). 6. Remove the red cap and screw the end of the hose onto the tire†s valve. Maintenance 119
 Tesla Model 3 | Owner's Manual Page 119 Page 121