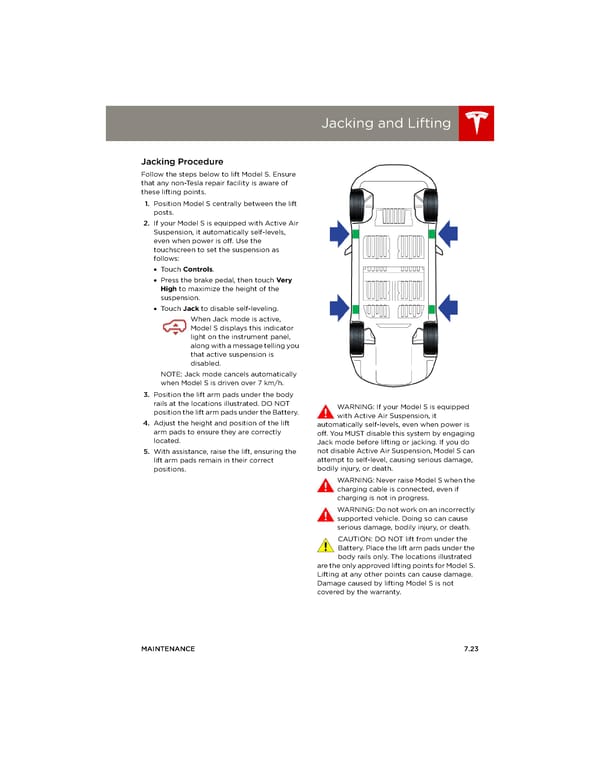
book.book Page 23 Friday, July 19, 2013 12:53 PM Jacking and Lifting Jacking and Lifting Jacking Procedure Follow the steps below to lift Model S. Ensure that any non-Tesla repair facility is aware of these lifting points. 1. Position Model S centrally between the lift posts. 2. If your Model S is equipped with Active Air Suspension, it automatically self-levels, even when power is off. Use the touchscreen to set the suspension as follows: • Touch Controls. • Press the brake pedal, then touch Very High to maximize the height of the suspension. • Touch Jack to disable self-leveling. When Jack mode is active, ModelS displays this indicator light on the instrument panel, along with a message telling you that active suspension is disabled. NOTE: Jack mode cancels automatically when ModelS is driven over 7 km/h. 3. Position the lift arm pads under the body rails at the locations illustrated. DO NOT WARNING: If your Model S is equipped position the lift arm pads under the Battery. with Active Air Suspension, it 4. Adjust the height and position of the lift automatically self-levels, even when power is arm pads to ensure they are correctly off. You MUST disable this system by engaging located. Jack mode before lifting or jacking. If you do 5. With assistance, raise the lift, ensuring the not disable Active Air Suspension, Model S can lift arm pads remain in their correct attempt to self-level, causing serious damage, positions. bodily injury, or death. WARNING: Never raise Model S when the charging cable is connected, even if charging is not in progress. WARNING: Do not work on an incorrectly supported vehicle. Doing so can cause serious damage, bodily injury, or death. CAUTION: DO NOT lift from under the Battery. Place the lift arm pads under the body rails only. The locations illustrated are the only approved lifting points for Model S. Lifting at any other points can cause damage. Damage caused by lifting Model S is not covered by the warranty. MAINTENANCE 7.23
 Tesla Model S | Owner's Manual Page 120 Page 122